
It was finally time to assemble the panel, as opposed to having it strewn about on the bench.
Here is the panel with the canopy essentially closed. The only items missing are the audio jacks on the right, the airspeed indicator, the lenses on the Fuel Guardian and labels on the top left indicators LEDs. I was pleased that the items at the top of the panel were both fully accessible and visible from a seated position.

Weights:
- Total panel weight: 28.9 lbs (includes connectors and switches, sans wires and tubing).
- Left: 7.5 lbs.
- Center: 14.9 lbs.
- Right: 6.5 lbs (w/o AS indicator).

Now for some details...I decided to paint the panel black, thinking that white wouldn't match the gray interior color I previously selected. I used the same Rust-Oleum Chalkboard spray paint as I applied on the glare shield.


For panel labeling, I had originally planned to use silkscreen, but later decided that I wanted a cheaper, simpler and more flexible option. So I purchased the Brother PT-P7000 PC connectable label maker coupled with the TZe145 laminated white-on-clear 18mm wide tape. Total cost was $58.19, shipped. Using Brother's P-Touch software, I printed out labels as appropriate, cutting each and then using needle-nose tweezers to peel the backing and place each label. It doesn't look as tight as a professionally fabricated panel, but I appreciate its low-cost implementation.


Some close-up images follow.
Left side.

Middle.
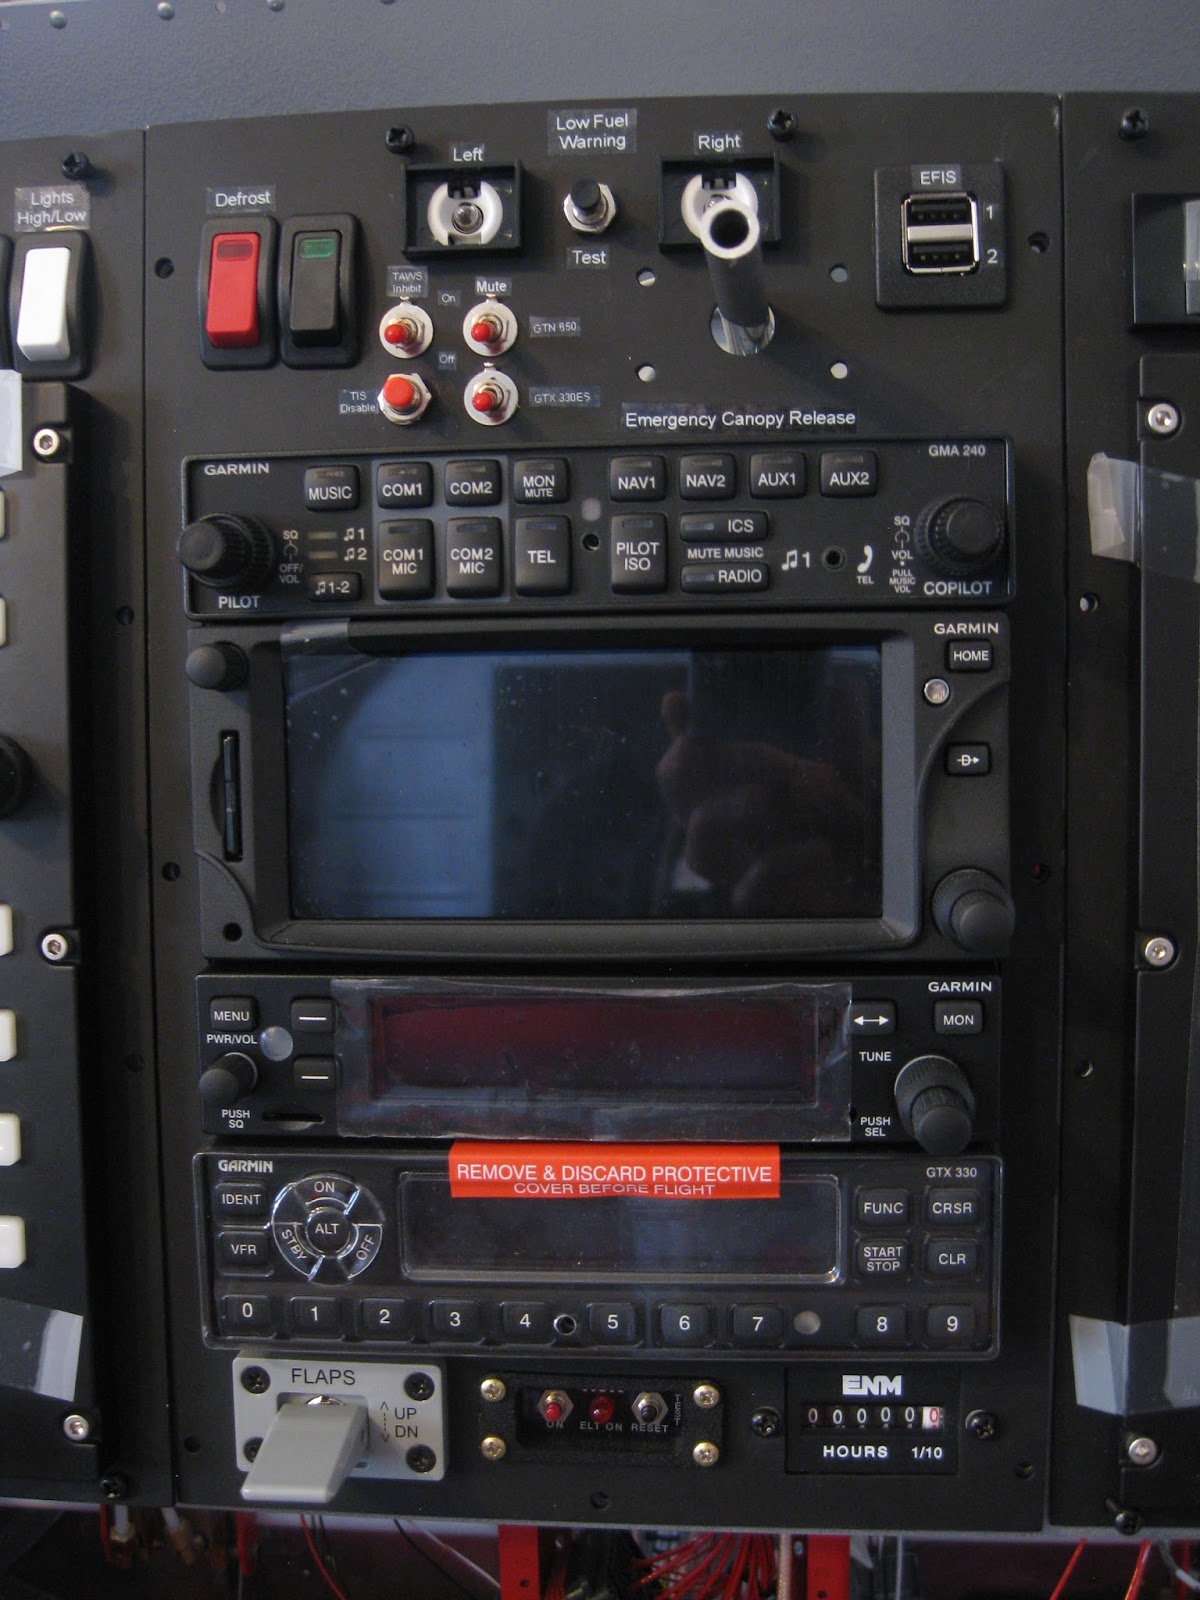
Incidentally, for the middle panel section, I had to hack out some of the F-01467 Instrument Panel Frame to accommodate my flaps switch and Fuel Guardian (images below - the corners were later rounded). Also, I had to take my Hobbs meter to the Scotch-Brite wheel so it too wouldn't impinge on the Instrument Panel Frame. The Hobbs is now affixed with only one screw, as the right screw could not accommodate a nut due to the Panel Frame, thus the right screw is Super Glue'd in..."shhhh".


Right side.
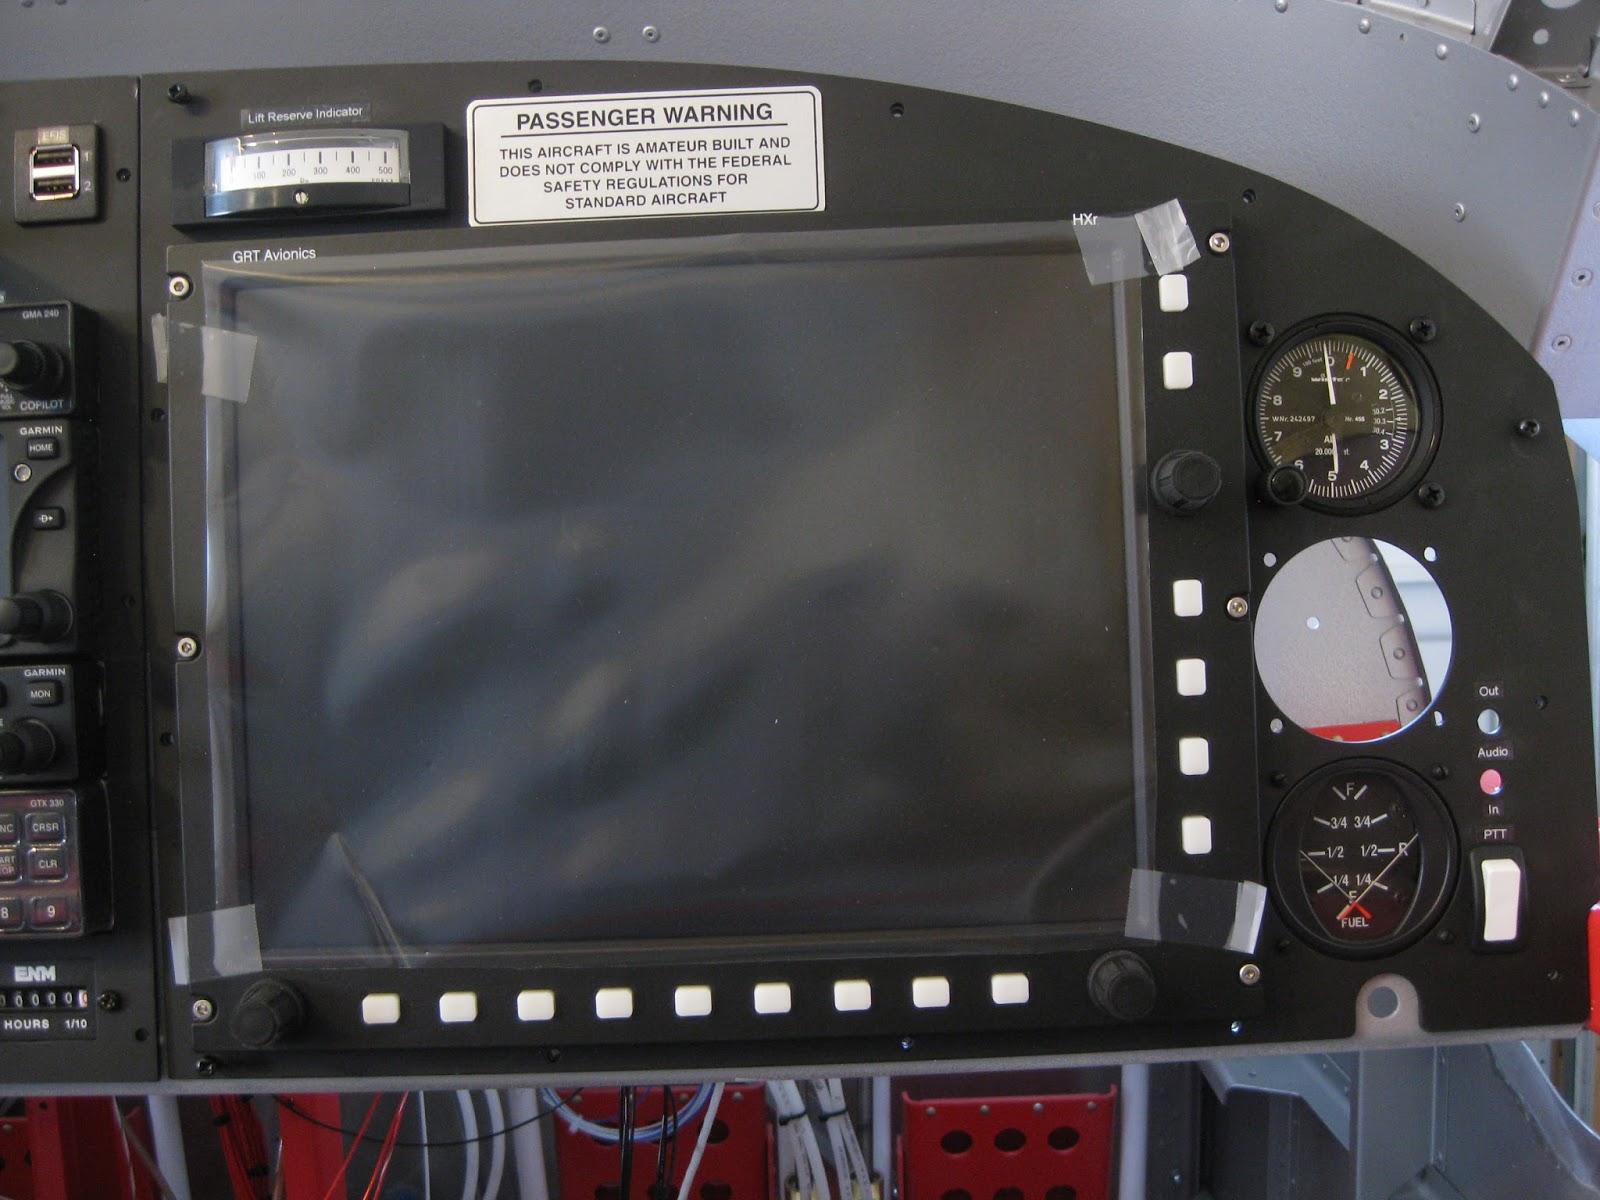
On the right side, similar to that of the middle, I again had to cut a notch out of the Instrument Panel Frame. This time it was to accommodate the Winter 2.25" three dial altimeter. One might also notice above the single 2.25" cutout lacking an instrument. That hole is to later accept an airspeed indicator. And the lift reserve indicator will later be color-coded to match the three flight envelopes.

Though I have been spending many hours placing the harness and other wiring, the panel is not yet ready to be fired up in the airframe. That is probably still 10-20 hours of work out. However, the majority of the panel was tested on the bench (a.k.a., both the kitchen and spare tables in my house).
Your panel looks great! I am finally making good progress here
ReplyDelete