31 August 2017

Finish: Wing Attachment.

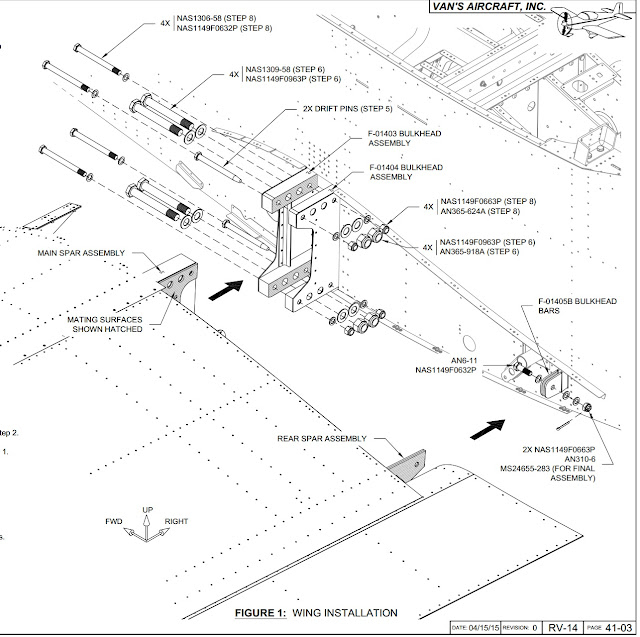
Immediately after the fuselage was transported to the hangar on day 2 of the move, wing attachment commenced.  It took about 20 minutes, each side, to place the wing and slip the bolts in (not including torquing).  There were no major issues.  With just two people, it was quite manageable.  We used a padded step-stool as a "third person" help hold the wing in place for the left side and the cradle for the right side.

Here we are taking the left wing from the cradle.


Moving left wing into position.


Slipping the drift pins in.  My friend rocked the wing gently whilst I aligned the holes and slipped the pins in.


Here are the drift pins.  I obtained these drift pins from my friend, who lives south of me and completed his own RV-14A.  He ground off the threads and tapered them.


Completing the bolt placement. 


There are 8 bolts per side, 4 on top, 4 on bottom.  Four AN9-size each necessitating 66.6-83.3 ft/lbs and four AN6-size each requiring 13.3-15.8 ft/lbs.  There is also a AN6-sized bolt with a castellated nut on the rear spar. 


Left wing in place.  At this point, the aircraft would be good for some spins...and that's about it.


Next the right wing was attached.  For this side we used the cradle as our "third person'.


Here's something to be wary of.  The web on the F-01404 Aft Center Section Bulkhead was caught by the thread of one of the AN6-size bolts when it was placed.  This caused the web to bend (left).  When the nut was placed and torqued down, the web resolved itself flush (right).


The bird has wings!  However, in this configuration, there would be very little lateral stability!


All bolts lined up perfectly after a gentle application of wing rocking.  Only a rubber mallet and wood block were used to tap the lubricated bolts into place.  The bolts were at ambient temperature of just under 80 degrees F and lubricated with liquid Boelube.

Hangar: The move to the hangar. Day 2.

Day 1 was moving everything but the fuselage.  Today was that final piece.

The wheels sit center-to-center about 7'5".  The outboard U-00002 Wheel Fairing Brackets add some 6" more to the width on each side.  A tilt-bed truck seemed appropriate for the approximately 10 mile ride to the airport.

The conversation with the tow truck company was entertaining:  "So, I have a question that you've probably never had before:  Can you move an airplane?"  They asked all the right questions so I had confidence they could do the job.  Turns out that the driver, who's been towing cars for more than 30 years, has moved two other airplanes during his tenure.  He understood the fragility of the airplane, took direction well and was quite personable.

The fuselage, prepped and ready.  You'll notice we secured the prop.  This is because my friend, who built an RV-9A, said that his prop windmilled at speeds greater than 45 MPH when he moved his fuselage to the airport.


The plane is first centered properly on the bed (left) then hoisted up with the winch by strapping on to the nose leg (right).  One unexpected item: The U-00002 Wheel Fairing Brackets sat about 1/4" above the side rails of the truck's bed.  We placed cardboard underneath them to prevent marring of the rails.  I wasn't worried about the axles bending as a result of that tight clearance as the ride was entirely on improved roads.


Strapping down the plane.  Each gear leg got a strap.  No concerns about squashing a brake line.  And if one did get damaged, it would have been an easy item to replace.


Nearly ready for the ride.


Off to the airport!


Halfway point (left).  Security gate (right).  I rode in the cab with the driver and my friend tailed us in the car.  It was fun to watch pedestrians and other drivers do a double-take as an airplane sauntered along the streets in front of their eyes.  Though many of my neighbors were aware of my building an airplane, a few of the neighbors were surprised at what came out of the garage.


Arrived to hangar safely.


Easing it back on terra firma.  Total cost $105.  Total time, from truck arrival at my house to truck departure from the airport, 52 minutes.


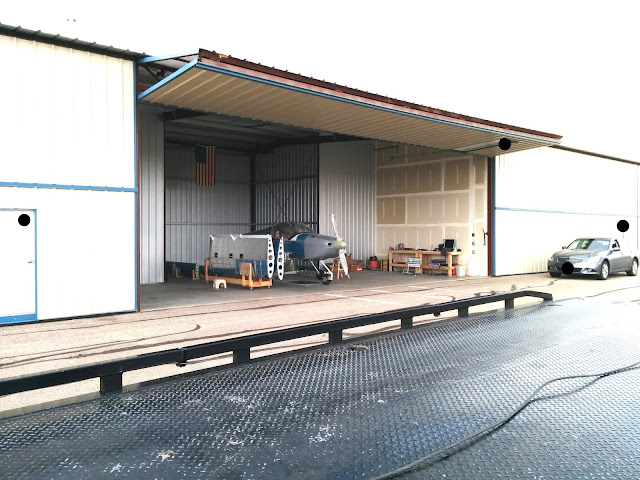
In its new home.  Waiting for final assembly.

29 August 2017

Hangar: The move to the hangar. Day 1.

The waiting game is over:  I secured a hangar at the airport.  Time to move the whole kit-and-caboodle.  Day 1 was moving everything but the fuselage.  Day 2 was the fuselage.

A 20' U-Haul could easily accommodate all but the fuselage.  Total cost $62.95 ($29.95 rental, $24.49 mileage plus taxes and some fees).


Here's my friend and I moving the right wing into the truck after we placed and secured the wing cradle inside.


Inside are the wings, engine crane, two EAA chapter 1000 tables, horizontal stabilizer, vertical stabilizer, wing tips and a board (to be placed under the plane to catch oil).  The elevators, desk chair and wet-dry vac were brought in my friend's pickup truck since we ran out of rope to tie things down in the U-Haul (in fact, you'll notice in the picture below that the vertical stab was not tied down at all).


The hangar with parts strewn about prior to organization.


The next day, the fuselage was moved.

27 August 2017

Empennage: Rudder. Redo.

I was anticipating a wait of 2+ years until I could get into a hangar at the airport.  During that wait, I thought it would be a good time to build a second rudder since I didn't like how the trailing edge of my first rudder came out.  The trailing edge of the rudder looked wavy.  The AEX wedge itself wasn't wavy, but the skin itself was due to poor technique.  This was exacerbated by choosing to alternate the rivet orientation (manufactured vs. shop head) along the trailing edge so that the skin was struck by the rivet set from different sides along every other rivet.

 
When my hangar fortune changed, I had 4 weeks to order and build a rudder in between my professional and domestic affairs.  After ordering the parts, $481.37 and 25 hours of build time later,  I managed to assemble an unprimed second rudder in 25 hours.  I chose to prime only the non-alodined parts, departing from my usual approach of priming nearly everything.

Follows are a few pics during the build.

Substructure (left).  Match drilling tasks (right).


Following back-riveting of stiffeners.


Trailing edge sealed in with sealant (left).  Trailing edge being riveted (right).  This time all rivets were oriented in the same direction.


Upper fairing ready for match drilling (right).


The R-00918 Attach Strips get nutplates attached to them to accommodate the R-911 Rudder Bottom Fairing.  The aft-most nutplates are in really tight quarters.  So much so, that I decided to use two-lug nutplates on them so I had enough room to squeeze their rivets.  To do that, I used my no hole yoke (ground down to fit into tight places).  However, the nutplate attach holes needed to be dimpled prior to riveting.  It's impossible to fit dimple dies in there, so I used the female side of a pull die with a washer to give the nose of the male side the space it needs (left).  It easily go into where it needed to be for dimpling (right).


Here is left Attach Strip with its nutplates attached.


Here is the final trailing edge (after empennage installation in the hangar).  I dare say it's perfect.


Here's a text file of the parts needed to construct a rudder, as culled from Section 7.