20 December 2014

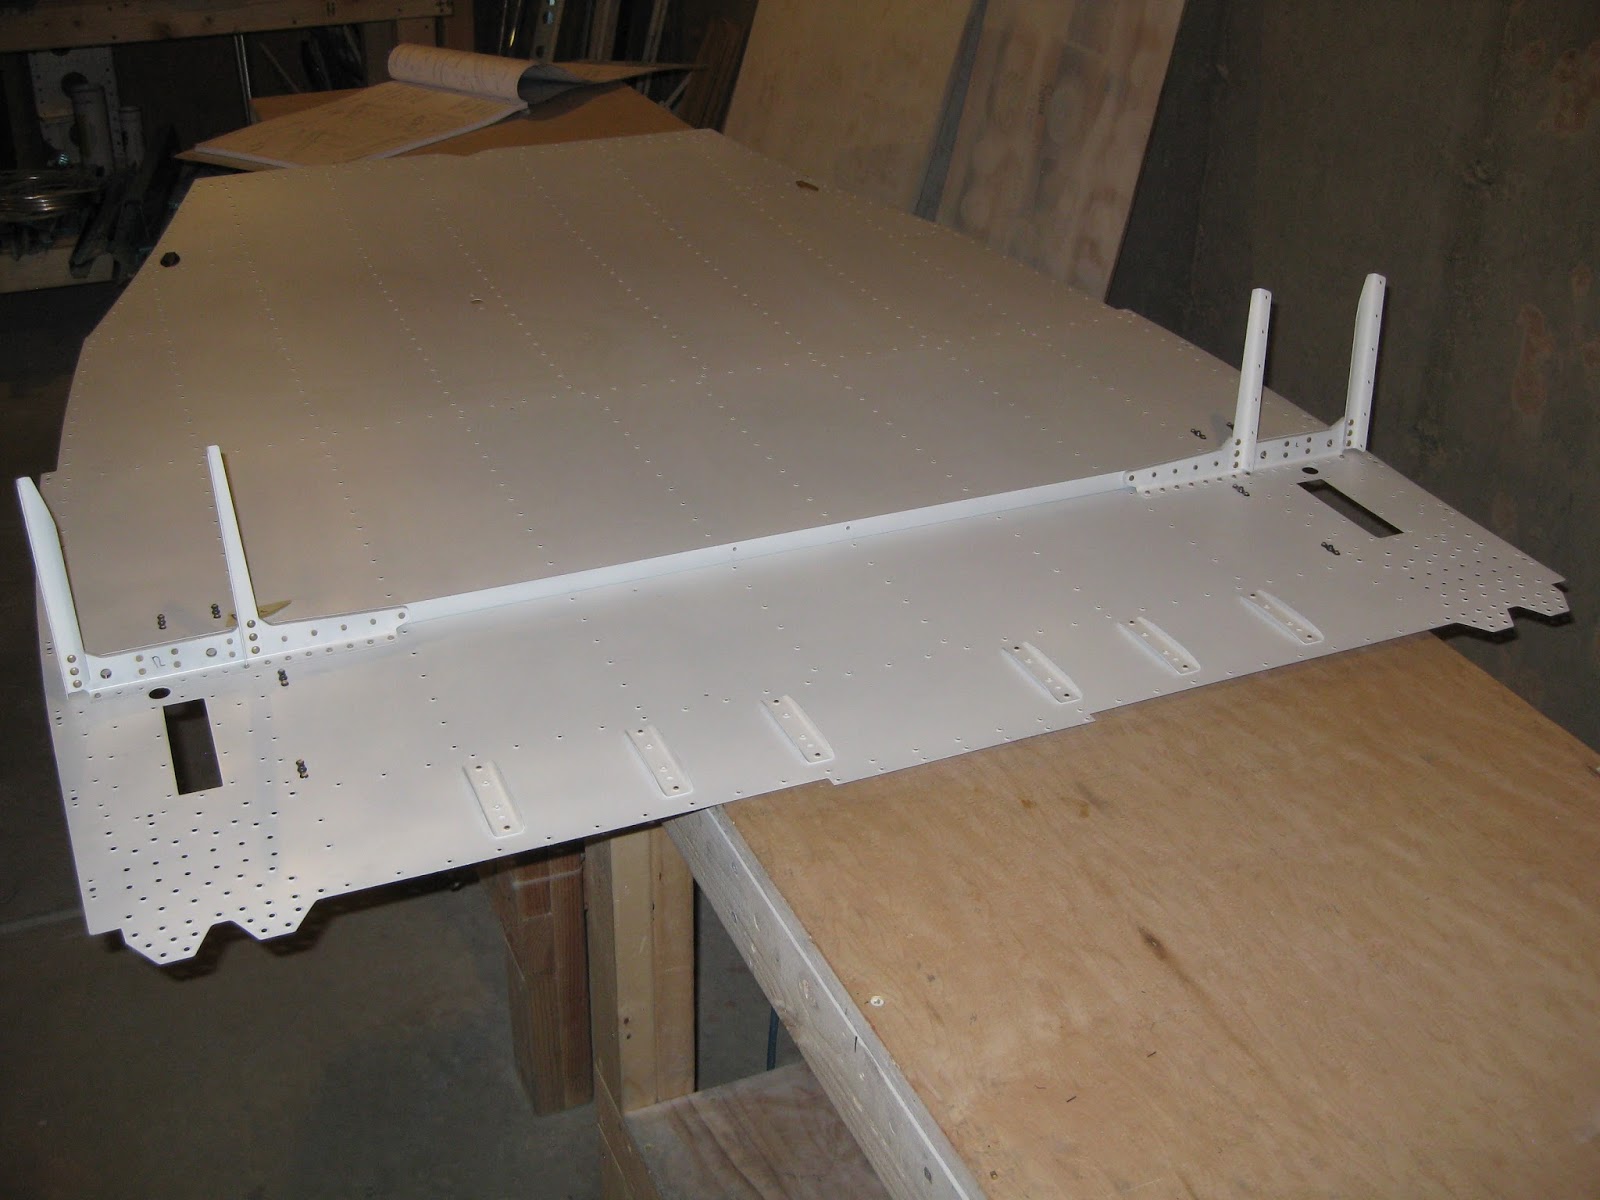
Fuselage: Forward mid and lower structures. Priming.

As usual, priming is an unremarkable affair.  Used my HVLP gun and two part epoxy primer.


First the forward lower skins.


Then everything else.


The astute might notice the F-01421A and B aft fuselage bulkhead pieces.  I'm going to try to replace the ones I currently have due to what happened here.

Fuselage: Friend's progress.

Less than two months after receiving his kit, one of my fellow builders sent me these pictures of his fuselage.  He's a speedy builder.  He completed his empennage in less than 30 days.


See his earlier completed empennage and his later completed finish kit.

18 December 2014

Fuselage: Forward fuselage lower structure.

The plans require a break of the bottom skins at an unusual location.

Update 26-Aug-16:   No they don't.  The edges of the skins aft of those lines get a break.  See here on VAF.  Whoops.  When this was ultimately riveted to the mid fuselage lower structure, the edges had a good layup regardless.  These are the kinds of mistakes that make one feel like a fool.


Here's how I approached that, with a little elbow grease.  Don't do this.  See above.


One pair of my VENT-00001A-L/R vent sides did not come with the holes drilled.


Not a problem.  I just drilled them in matching to the other sides.  If you look closely, you'll see I was a millimeter or two off, but everything still lined up well on a test fit with the firewall and vent.


The vent inlet assembly uses some stainless steel rivets, MS20427F3-3.5.  I chose to squeeze these.  It takes noticeably more elbow grease to set these rivets as compared to an aluminum AN426-AD3-3.5.  Below are the assemblies.  I only need to dimple the holes marked "F" on the right (which is the left assembly) to accommodate the error I made in dimpling the left firewall side.  I'll need to pick up a set of dimple dies so I can grind down the male die to fit that confined area I need to dimple.

07 December 2014

Fuselage: Mid fuselage lower structure. More riveting.

The gear brace angle gets riveted to the center bottom skin.  Later, the forward bottom skins overlap the center bottom skin.  So not all rivets are placed yet.  Back when I cut out the gear leg holes in the forward bottom skins, I had traced the overlap onto the center bottom skin.


With all the gear brace rivets taped in, the tracing makes identifying the rivets to be left out an easy task.


A builder posted to VAF showing that it's difficult to access the shop ends of the rivets under the inboard angles on the gear brace.  Van's agreed, suggesting that the angles be riveted onto the brace after the brace is riveted onto the skin.  Luckily that builder was also in touch with me prior to my reaching that step.  I was able to ensure the angle was orthogonal when riveting it in the modified order.


Completed.


05 December 2014

Fuselage: Forward mid fuselage bulkheads. How to ruin them.

The bulkheads have some bolt holes that are used to hold the bulkheads together after they've clasped a "lower drag fitting" (see page 29-03).  These holes should have a tight tolerance.  The holes in the bulkheads were reamed to size at the factory (as verified by consulting with Van's).  However, the holes in the mating angles and bulkhead webs have not been.  The builder is tasked with reaming them him/herself once the parts are mated.


To properly ream, one ought to use a drill press to prevent the introduction of an incorrect bit trajectory.  Negotiating these bulkheads on a consumer drill press is difficult.  So I enlisted the help of a friend with a legitimate shop that has a milling machine and more spacious digs for the task.  Well, turns out things didn't go well at all.  Below are some pictures showing some of the holes with and without the proper bolts.  The issue is obvious.


I believe the problem was caused by the reamer not being properly lined up with the holes to be reamed.  I think the reamer came in at an angle.  Lots of material came off the reamer and the lubrication got hot enough to smoke.

Unfortunately, this is an example of always being sure that you understand every element of the work being done, especially when someone else is doing it for you.  I let my guard down and should have being more proactive in involving myself in this process.

Anyway, the parts needed to be replaced.  For the curious, new bulkheads cost $575 for the forward and $540 for the aft.  Angles cost $11.10 each for the forward and $19.30 for the aft.  Cover ribs are $12.00 each.  So that's a good time.

Click here to see the post involving the redo of these parts.