
I decided to redo my fuel tanks. See here for why. The entries specific to the redone tanks are here.
Prior to the initial leak test, I went through the tanks with more sealant. This encompassed slathering sealant under the curved surfaces of the J-stiffener and tank attach assembly brackets. Because these areas are hidden from view, I used the "mirror-on-a-stick" approach to verify the slather.
Update 17-May-14: A much better way to approach this is described here.

The various fittings and the low fuel level optical sensors were installed and sealed.

The tanks were then dressed with toilet paper to preserve the evidence of any leaks (odd flashback of my youth notwithstanding). With the tanks water-filled and a full tube of food coloring dye on board (not sure of the origin of this idea, but Mouser turned me on to it), they each sat for while soaking up life.
The right tank has three leaks:


Right tank filled with water. Leakage puddle visible on inboard side. But no other rivet or seam leaks.

Internal bleeding? No, just food coloring to stain the professional toilet paper detector. Luckily the neighbors weren't curious about all the red water and associated stains on my clothes.

The right tank has three leaks:
- At the junction of the skin, tank attach assembly and inboard forward nose rib on the forward side.
- Filler cap left side at the cap's o-ring.
- Filler cap right side also at the cap's o-ring.


Right tank filled with water. Leakage puddle visible on inboard side. But no other rivet or seam leaks.

Internal bleeding? No, just food coloring to stain the professional toilet paper detector. Luckily the neighbors weren't curious about all the red water and associated stains on my clothes.


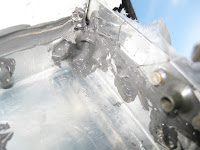
Left image: Source of inboard leak. Right image: Two o-ring leaks on the cap.
The left tank has no apparent leaks.


No, not a fuel tank hematoma. Just food coloring.
After fixing the leaks identified on the right and letting the tanks dry, it'll be time to install the capacitance probes and baffles, wait for curing and do the final leak test.
No comments:
Post a Comment