
Because I'm redoing my fuel tanks, I'm really only posting progress reports rather than additional details. See here for why I'm redoing my tanks. Technique details on the original fuel tanks are found in their associated posts.
Once the J-stiffeners are in place, it's worth checking the underside (which is the ship's forward side) with an inspection mirror to make sure enough sealant squeezed out during installation. If not, it's hard to get under there to apply more sealant. On my original tanks, I loaded up sealant on my gloved fingers and tried to spread it around. Rather than going where I wanted it to, it mostly went everywhere else. This lead to a lot of extra sealant being used (as an aside, it will be interesting to weigh the new tanks and compare them to that of the old tanks).
Turns out, to accept a nozzle, the Techon cartridges I use with my Semco gun (left) have a 1/4" threaded female fitting. A quick trip to Lowe's found me these nice 90 degree 1/"4 male elbows (right) with barbs on the end. The aperture size is perfect for sealant application.

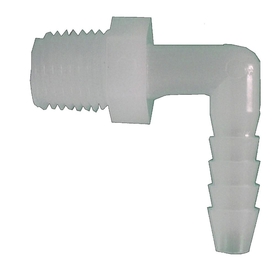
As a demonstration, you can see it fits the gun perfectly and easily sneaks sealant under the J-stiffener (and the tank attach brackets too). A quick run of the Popsicle stick spreads the applied sealant out nicely. In fact, I see no reason why a short length of 1/4" tubing couldn't be used for a unidirectional nozzle. Maybe I'll try that on my next, next set of tanks!


No comments:
Post a Comment