Showing posts sorted by relevance for query fay. Sort by date Show all posts

15 August 2013

Wings: Fuel tanks. Right fuel tank ribs fay sealed.

I decided to redo my fuel tanks.  See here for why.  The entries specific to the redone tanks are here.

Right tank fibs are fay sealed in anticipation of riveting tomorrow evening with the help of an RV-9A builder.  I figured it was good to build the other tank built with two people in case my solo approach introduced an inherent incipient failure mode.

First I slather the sealant on the rib flanges.  Then each rib goes into the skin with just the bottom-forward most hole held with a cleco.  After putting in all ribs the same way, I put in a cleco on the top-most forward hole, then progress aft, alternating top-and-bottom.  This makes sure the skin folds around the ribs properly and I don't have to finaggle the holes to line up.  Wish I did that on the leading edges (I entirely cleco'd the bottom first, then did the top)!


Today marks the 300 hour crossing.

05 August 2013

Wings: Fuel tanks. Left tank fay sealed.

I decided to redo my fuel tanks.  See here for why.  The entries specific to the redone tanks are here.

Progress on the left tank continues.  I fay sealed the ribs into place Sunday night and riveted them in tonight, solo.  Only took 2.5 hours.  On each rib, I removed every other cleco, cleaned out the holes, dabbed in sealant and bucked them.  Then did the same with the remaining clecos.  After the marathon was over, I removed 7 rivets because I didn't like their shop heads.  I ended up using two Rivets of Shame since I didn't drill into the head deep enough, "stripping" the head when I tried to pry it off with my punch. 

Cleco'd and sealed rib.  Turns out the flutes in the ribs are great little channels for fluid and subsequent leaks, so you have to be sure to fill them generously with sealant.


All left ribs cleco'd and sealed.


Left tank bottom with ribs and stiffeners riveted.  Tank attach assembly and J-stiffener sealed and cleco'd in.


Top view showing how different the sealing looks on both sides of the ribs.


The syringe gun was very useful for applying sealant to the shop ends on the ribs and their nose flanges.  It's very hard to get back there without making a mess sans gun.

Picked up a flaring tool for the vent lines and later fuel lines.

29 July 2013

Wings: Fuel tanks. Stiffeners sealing.

I decided to redo my fuel tanks.  See here for why.  The entries specific to the redone tanks are here.

I yoinked a Brecknell PS7 Electronic Postal Scale, acetone (rather then MEK) and Popsicle sticks for the first stage of sealing the tanks this evening.  First I removed the masking tape to expose the scuffed mating surface of the skins.  Then a thorough cleaning with the acetone.


Then it was opening part A of the sealant.  That stuff is super thick!  It doesn't get thinner when mixed with part B.  In fact, I broke a Popsicle stick in it. 


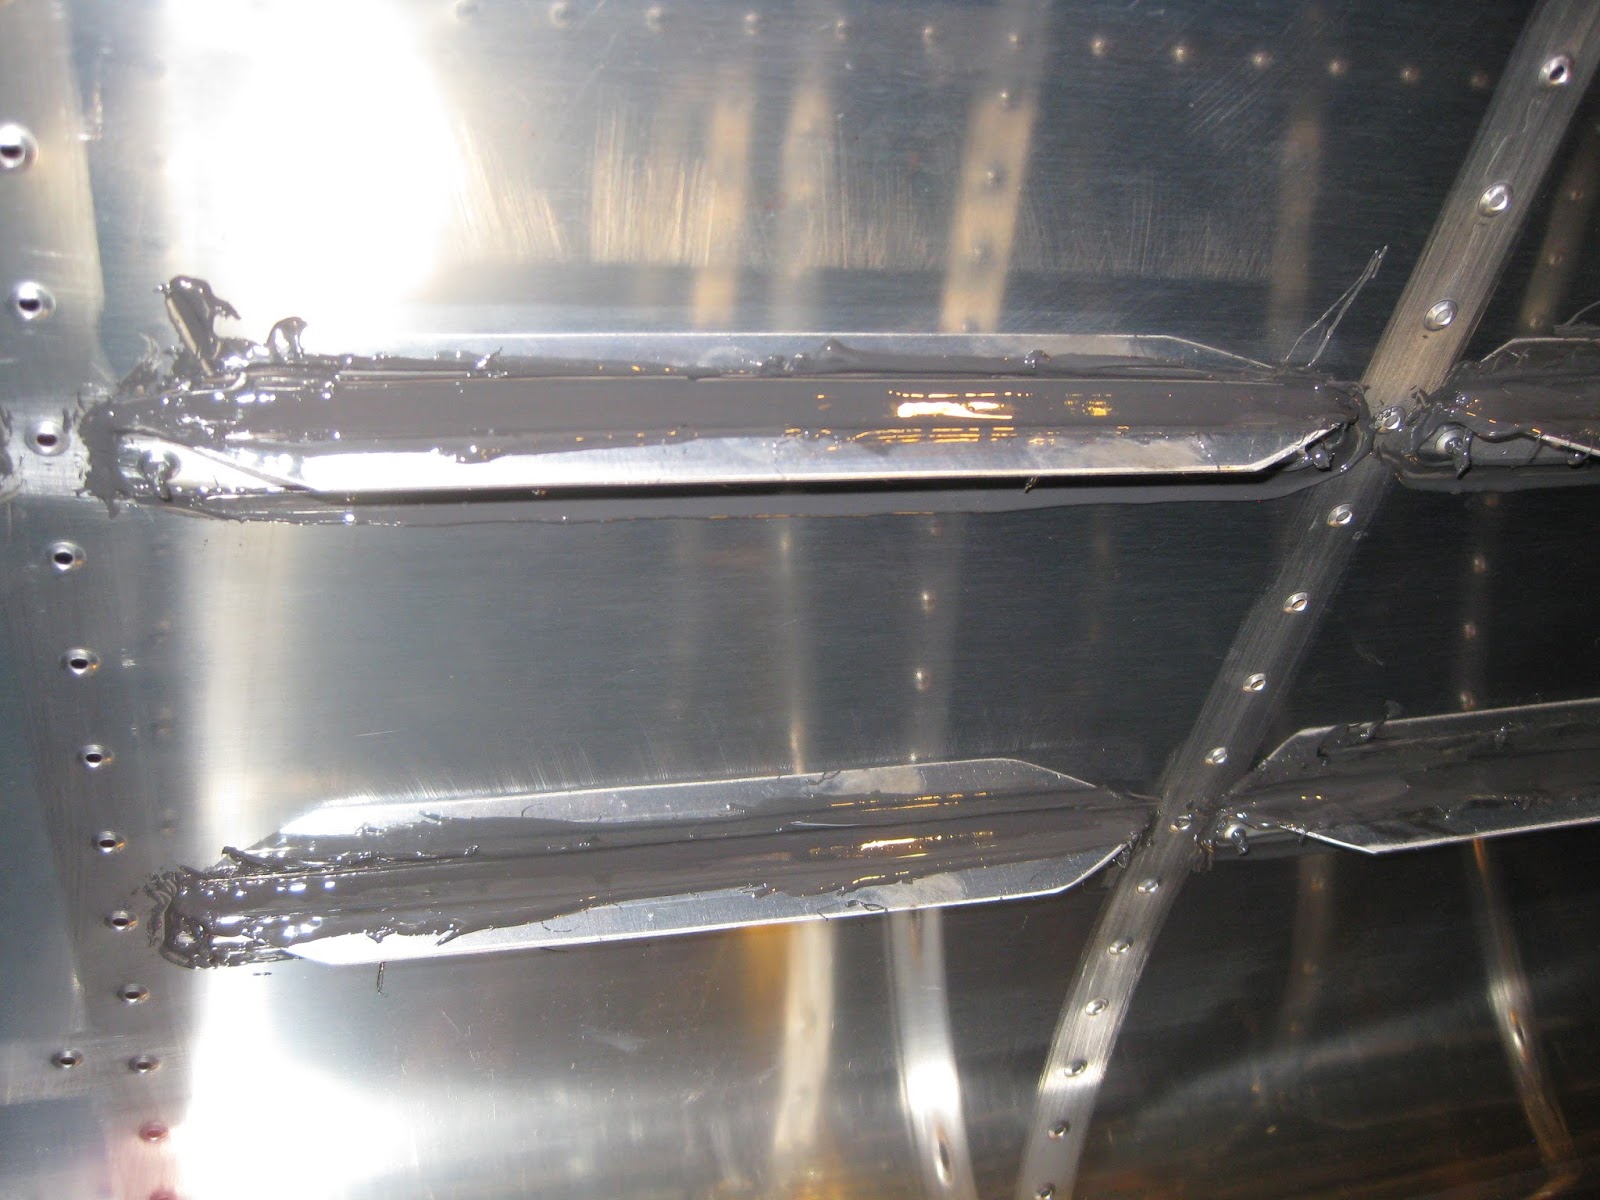
Here's a stiffener with the mixed sealant slathered on (this is called a fay seal) using the syringe gun.  Turns out that gun isn't too useful at this point.  Seems like the Popsicle stick does fine.  Filling the syringe is not as simple as just aspirating the mixture, since it's too thick.  You have to load it with the Popsicle stick.


Weeping holes.  After cleco'ing, the sealant comes out.


All stiffeners in place, every hole cleco'd.  Each one of the stiffeners was reworked with a fillet seal.


Close-up of fillet seal around stiffener.


Fuel flange on both sides (left skin on left, right skin on right) with vent line clip.


Inboard ribs.  Somehow I lost the other T-1010 Anti-Rotation Plates I bought last week, which is why you'll notice the obvious missing pieces.  Can't find them anywhere.  Need to order two more.  I even checked the vacuum thinking I may have sucked them up accidentally.


All-in-all, it wasn't too bad an experience.  I wore my respirator so I couldn't smell anything.  Tomorrow will see me try to back rivet, wet, all the rivets for these parts without help.

28 January 2014

Wings: Fuel tanks. Doing them over.

My fuel tanks tested leak free, both left and right.  But there was one thing that bothered me so much, that I decided to scrap these completed tanks and make news ones:  The skin-to-baffle countersinks.

First issue was that those countersinks were too shallow.  They were just on the hairy edge of being at the 0.006" proud spec for shaving.


I went ahead and shaved them all with my shaver back in October of 2013, figuring I'd probably do the tanks over in the future anyway.


The bigger concern was that the holes in the skin were excessively elongated (they went down to a "knife-edge" but that may be unavoidable with a skin thickness of 0.032") as I wasn't very careful with keeping the drill speed slow.  I hadn't noticed the issue until after I was done sealing the baffle.  So, though I don't know if the corresponding baffle holes also got elongated, I had to assume they were.

Now, the plans initially have you skip countersinking every 10th hole to help keep things aligned.  The holes that you skip get countersunk after the baffle is sealed in.  This meant that I could rummage through my image library and possibly find illustrative images with the non-countersunk holes to see how they compare to the countersunk ones.  Two such images are below.  You can see which holes were skipped (highlighted in red) by their smaller radius.  That's the radius appropriate for an AD3 rivet.  The larger holes were too big. 


The two images of the baffle holes I found (not shown) didn't show evidence of elongation.  Under the assumption that the baffle holes weren't elongated, this is what the squeezed, set rivets would probably look like (pardon my poor computer art skills).


I also wasn't confident that the AD-42H pop rivets holding the tank attach zees were properly pulled.  Here's an image from inside the tank (looking through the filler flange).  The heads didn't look consistent to me.  I may not have been pushing down hard enough on the rivet puller when setting these rivets.


Perhaps I'm being too conservative, however I just wasn't comfortable with these outcomes.  So I shelled out the $1223.90 for replacement tanks.  For the second build, I will:
  1. Dimple, rather than countersink, the skin-to-baffle holes (being deliberate with my sealant use to ensure the baffle seals).  There is successful precedent for this (here is the reason for using the countersink approach).  It would be a stronger joint and avoid the pitfalls of dirty countersinking.  Apparently it's important to use reduced diameter dies on the baffle to avoid distorting the flange.
  2. Rivet the flange bearings last to ensure access to all rivets on the tank/rib assembly.
  3. Avoid missing a dimple.
  4. Avoid needing an AD5 rivet.
  5. Seat the AD6 rivet filling the outboard rib tooling hole so that the adjacent AD4 rivet can be fully set.
  6. This time, I will not use deeper dimple dies.  There's an interesting thread about this. 
  7. Do a better job routing the capacitive probe wires.  I thought they were too loose.
  8. Do a better job shaping the fuel float wires.  I had to buy a second set on the first run and they ended up with slightly different deflection extrema on each side.
  9. Generally, apply the sealant more cleanly (example of poor aesthetics can be found on the third picture above). A sealant gun should help here (purchased 3-Feb-14).
  10. Continue using the fay seal technique as described here. 
  11. Update 26-Feb-15:  If I were ever to do a third set of tanks, after sealing the mating surfaces, I would not shoot the rivets wet. I would remove the sealant from the dimple, buck/squeeze the rivet then dollop the shop head.  Apparently even Van's doesn't shoot their rivets wet and doesn't seal in the shop heads in QB kits (read whole page 15).  At least, that's how I construe the conversations in those two links.
Click here to follow my fuel tanks redo in reverse chronological order.

09 May 2014

Wings: Fuel tanks redo. Stiffeners, cap and drain flanges fay sealed and riveted.

Because I'm redoing my fuel tanks, I'm really only posting progress reports rather than additional details.  See here for why I'm redoing my tanks.  Technique details on the original fuel tanks are found in their associated posts.
First off, the Semco gun rules!  It's fast, my forearms don't get blown and it's a lot cleaner to work with than my original syringe gun approach.  The Semco gun still has a slight after-discharge when the trigger is released, but it's manageable.

On the original tanks, I back-riveted the stiffeners.  This time I directly riveted them with the mushroom set and Mr. T.  This method is easier and I didn't feel like I gained much, if anything, in terms of aesthetics with the original tanks.

Mid-riveting process.


Left drain and cap flange rivets.


A completed stiffener.


Looking down the left and right tanks.  So far, they are so much cleaner than my original tanks.