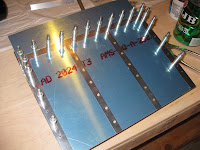
31 March 2013

Shop: Tools, it never ends.

I really like the grinder I got to replace the original one.  It is a beast.  But it shook the whole house when running.  Wheel dressing didn't help.  The wheels were on so tight, I could only get one off.  The comments on Amazon were quite favorable towards the balance of this grinder, so I'm going to exchange it for another.  I feel bad since my Amazon Prime membership means they do 2 day shipping.  The extra plywood from the tables I built will probably be used for a dedicated grinder table so my drill press, band saw and other tools don't die from vibration.

Turns out the Scotch-Brite wheel I got is 1" thick and the grinders I've had so far can only handle 3/4" wheels.  Whoops.  Apparently these things aren't standardized.  Live and learn.  It's not that big a deal.  Just means that I won't have the wheel cover on, unless I want to buy another wheel (link no longer works) (and, it's far cheaper there).

Speaking of my new drill press with the wobbly bits, I bought a ball joint separator from Harbor Freight Tools to remove the chuck, thinking that there might be some debris that got stuck on the spindle or in the shank.  Cleaning both didn't help.  After closer inspection, turns out that jaws in the chuck are not straight.  Going to call Sears tomorrow to see if they'll send me a new chuck.  I already threw away all the packaging, plus they no longer carry that model even though I bought it 17-Feb-13.  It does have a lifetime warranty, so I could take it to the store and have them deal with it.


In an effort to reduce any RMI, I picked up a low RPM Black & Decker AS6NG Alkaline Cordless Screwdriver for deburring. Also got Shop Fox D3230 Magnetic Vise Jaws, 4-1/2-Inch to prevent marring gripped work, plus the book Standard Aircraft Handbook for Mechanics and Technicians to read when I'm on the road for work.

After reading Mark Cattell's experience deburring the ribs (the link to his site later become invalid and points to a malicious site so it was removed, 17-Feb-18), I'm eying these parts from Avery:
I'm also on the prowl for a rivet organizer.  I'm going to need one that has locking drawers and can withstand falling 4 feet onto a concrete floor without exploding into a shower of rivets.  There is no doubt that whatever is holding my rivets, it will fall.  Turns out, I'm going to go with this idea.  It's just genius.  I'll just cut the labels from the bags and tape them to the bottles.

30 March 2013

Practice: Toolbox kit complete.

Completed the toolbox kit.

From this:

 To this:

Total build time:  6 hours 4 minutes.

A lot easier than the other projects, probably owing to having spent time with the others prior to this one, and that this project was mostly just match drilling and riveting.

What I learned:
  • Rivet squeezer is much more reliable, at least in my hands, than the rivet gun.  I used the squeezer at every chance I had since, with the other practice projects, I didn't always get the head flush with the work and ended up with a nasty gap.  I had only a few rivets set with the squeezer that weren't flat on the shop end.  These probably occurred since, when applying force to the squeezer, I didn't maintain the squeezer in the same plane.
  • I couldn't figure out how to set the rivets on the bottom half latch.  I tried every permutation I could think of with the tools at my disposal.  Nothing would fit with one of the holes cleco'd.  Ultimately, I left the cleco off, tapped one rivet a few times so it would set slightly, then banged the other one, adjusting the latch as I went to make sure it was straight.  After the second rivet was fully set, I went back to the first to finish it off.  This caused the rivet to squish in between the two metal layers, creating a gap.
  • Even though the cupped set, for the universal rivets, typically stays put on the head, it can walk.  I ended up mashing one universal rivet head because I got too cocky.
 
  • Sometimes, after match drilling, deburring and dimpling, the rivets still were a tight fit.  So I "rematch drilled" and redeburred on about 6 or 7 rivets.  Wonder what's up with that and if that technique would pose structural integrity risks on the airplane? 
  • The hinge and handle could not  be cut with my snips.  In fact, the blade is now ruined.  So, I tried cutting them on my band saw.  Though it worked, it probably stressed out the blade.  The wire got red hot!
  • I used the dimple dies (dice?) in the squeezer for a few of the corner holes that wouldn't fit in the DRDT-2
  • I had a really hard time deciphering the description regarding the hinge orientation.  I eventually found these two pages that helped me get some confidence:
Here are some shots of my riveting.


My pneumatic cleco tool from Avery didn't work.  90% of the time, it would only partially open a cleco, then stop.  I finally tracked the problem down to an air leak around the piston.  When it was leaking, it couldn't open the cleco.  The few times it had a seal, it could open the cleco fine.  I'll let Avery know so they can replace it for me.

Also, seems the time lapse software is failing me.  After a few hours of running, it starts to drift and takes images at longer and longer intervals.  For example, today it was setup to take images every 10 seconds, which it did, initially.  By the end of the build day though, it was taking images every 31 seconds.  That sucks, since I was calculating the time I spent working by how many images were acquired.  I'll mess around with it and see if I can track the issue down.  For now, my build times aren't accurate.

I'm going to switch to using a butane soldering iron for scoring the protective vinyl.  The cord from the electric iron 1) gets in the way of everything and 2) is going to get sliced by a sharp edge, which would provide me with a brief light show and an undesired spot weld.

Finally, project 2 (the control surface) is on hold.  I had to order this pop rivet set so I can dimple at the tapered edge of the ribs (the vise is cool, but I was concerned that it may still have a challenge getting into tight spots).  I broke my (borrowed) #40 countersink bit trying to make the suggested tool in the plans.  Turns out the guide hole on the bit is #30!  I didn't realize that, so it snapped right off due to the friction.  From now on I will check these things.

Here are my outstanding issues that need to be solved prior to my wings coming:
  • The new bench grinder itself, or the wheels are poorly balanced.  It shakes, rattles and rolls.  Dressing didn't help.
  • The drill press bits always wobble.  The chuck seems center, but the collar doesn't.  Not sure what to do just yet.

27 March 2013

Blog published, plus other build sites.

Time to share what I learn during my build!

Here are some other RV-14/A build sites that I've found so far:
Also replaced my bench grinder today since the original one was way out of balance.  I'm going to try the JET 577101 6 inch Industrial Bench Grinder.  Total tool cost thus far:  $2,766.62.

I decided to up the image frequency of the camera (see computer post for software info) from every 30 seconds to every 10 seconds.  It didn't seem like enough detail was being captured in the time lapse videos.  I might throttle that back to every 15 seconds:  Fewer images mean a shorter build movie.

26 March 2013

Shop: Pneumatic cleco tool.

All this cleco'ing is killing my hands.  It's the 21st century so I need to preserve my tendons for computing needs.  I ordered this air cleco installation tool bad boy at Avery (Update 17-Dec-15:  The Avery family retired and the business was subsequently shut down).

Update 1-Apr-13:  This part originates from Pan American Tool Corporation and is nearly 33% cheaper thereCleaveland also carries this tool for roughly the same price as Avery.


Turns out Ed has a great demo and shares his very similar thoughts on the need for this tool.

Total tool cost thus far:  $2,662.89

Also, today I decided to order Vans' practice toolbox kit.  I'm still not feeling confident in my metalworking skills just yet.  It will be here Friday along with the new grinder.  I'll start that after I'm done with project 2 (the control surface).

Practice: Project 2.

Time to make the practice control surface.

Had my first experience drilling out rivets since I got too excited and riveted the reinforcement plates to the spar without the ribs.  D'oh!  It caused me to bend some of the pieces and ream out the holes to a larger diameter.  So a potential space between parts became an actual space.  When banging the new rivets, their shop ends graciously filled that space preventing things from sitting flush.  Oh well.  Better to learn now than later.

Also, it's really dang hard to use the Main Squeeze and keep the factory end of the rivet flush to the work.  Takes some planning on your part.  If you screw it up (and by "you", I mean "me"), you get a rivet that lives in places it shouldn't.  I'm guessing I'm going to end up with a pneumatic squeezer to save my hands and to help keep things properly aligned.  Turns out, those bad boys are pricey though.

I really need some rubber pads on my vice.  The vice chews through anything that's put in it.  You can see some of the clamping marks on the spar.  And if you're curious what the pretty mark is on the reinforcement plate, that was from my band saw.  I wanted to see if slicing off a rivet head using that machine was practical.  Turns out it works pretty well...if you're not concerned with anything else that the blade will touch.  So, not an option for true work.

Note:  Don't drill through the length of the rivet when trying to remove it.  Drill a hole in the head and see if you can push it off with the drill bit.  If not, bang the edge of a file against the head with a hammer.  It will pop right off.  Then use a punch to hammer out the body.  Speaking of which, I really ought to get a punch.  I was using a thin allen wrench as a punch.  Shhh!

Pages I consulted during this project are below.  Thanks guys!
So far up to 6 hours and 6 minutes on this project.


Other entries for project 2 are here and here.

17 March 2013

Practice: Project 1.

Time to learn how to rivet with the practice project.  What an experience.  Key takeaways:
  • Read, read, read.  Understand clearly what you're being asked to do!
  • Check, check and recheck every step before you do it.
I had a number of mistakes such as countersinking for round head rivets, using the wrong dill bit size and letting the (2x) rivet gun go for a walk when pounding.  As you can see from my work, it ain't very good.  Best to learn now rather than with an airplane part.

The rivet gun wouldn't work initially.  I spent some good time trying to get it to go.  Turns out I needed to operate it in different orientations.  Apparently, if it isn't used for a while it gets gummy inside.  Once it loosens up, it happily bangs away.  It's a pretty cool tool.

If you have a countersunk hole for a rivet that isn't made for such a hole, it will kindly fill up that (what should be) empty space and separate adjacent parts.  You can see how my seam didn't sit flush.

Total time spent 5 hours and 16 minutes.


14 March 2013

Shop: Dimpler platforms.


Today I finished the dimpler platforms.  I departed from the usual design and made two separate supports on stilts.  We'll see if going against years of collective experience was a good decision.

My house had some leftover carpet in the basement, so no need to waste money there.  I used outdoor carpet glue on the surface with 80 pounds of weight pushing down overnight whilst it dried.  I had to buy a staple gun to wrap the carpet edges around the platforms. The electric one costs just as much as the manual one.  Might as well reduce my workload!

As you can see, I went with the DRDT-2.  This thing is very well built.


Total time spent on dimpler setup and platforms, also including drill press assembly and grinder mounting:   10 hours, 28 minutes.

12 March 2013

Shop: Table 4.

This table used some wood that I cut with the circular saw so a few of the cuts weren't perfect.  It has a few millimeter depression in the center which I could shim out if it ever became a problem.  That's okay: I really only need two perfectly level, same height tables.  This fourth table is intended to support the dimpler and its platform

You can see the Van's practice project laid out on the last image.


3 hours, 40 minutes.

11 March 2013

Shop: Table 3.

This one came out perfect too.  Having two other tables to support my work was so much easier on my back and legs than having to do all of this on the floor.

\

3 hours!  Getting better at these.  

I did have to get some more 2x4s today since I made some mistakes initially when learning how to be a carpenter.  I had intended to only make three tables, but it's clear I need at least 4 with all these tools.  I can still make another smaller table out of the leftover plywood if I need to.  Not sure what I'll be up against when building the wings.

10 March 2013

Shop: Table 2.

This table came out perfect!  Amazing what good cuts will do.


4 hours, 40 minutes.  I hooked up the Sioux DR1412 air drill to avoid having to swap out screw and drill bits.  Sounds like an auto garage in here!  The compressor cycled briefly after each hole.  That's livable.

03 March 2013

Shop: Time for a miter saw.

That circular saw I borrowed was a mess to work with.  So obviously I need to buy more tools!  In comes a Ryobi 14-Amp 10 in. Compound Miter Saw.  Wow, did this cut (ha!) the time it took for me to handle all this lumber for my shop tables/workbenches.  Saw dust everywhere.


Total tool cost thus far:  $2392.52

02 March 2013

Shop: First table construction.


Having no clue what I was doing, I decided to use a hand-pushed circular saw that I borrowed from a friend. My first cuts were far from straight, so the table surface was all kinds of warped and the table itself was mega-wobbly.  I devised a very time-consuming method to make straight cuts (clamping a 2x4 orthogonal to my cut, using the square to align it, and guiding the saw against that 2x4), but it was too late:  This table was not going to be level by any stretch.  That's okay, this table won't be a build surface.  It will be for the drill press, bench grinder and band saw.

Here is a great video that I learned a lot from with respect to building these.  I watched this a few times and even paused it during my own build.  And these guys had a build marathon.


8 hours, 10 minutes.  No  joke.  Took a while to learn how to use the countersink microstop and I did a lot of bit changing with the cordless drill.  I put the wood glue on a few members, but decided it wasn't going to add much, so I stopped using it.