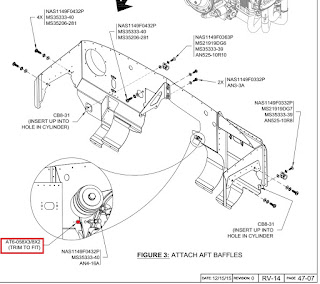
I completed assembling the baffle parts in April 2016, as I sought to get ahead of future work. It turns out that I was 10 months ahead of myself, as once I finished assembling them, I set them aside until February 2017 to attach them to the engine.
The baffling was quite straightforward to complete. Sometimes I needed to get creative with a makeshift "jig" to rivet the pieces together (images from April 2016).
A couple of images showing the aft baffles in their completed states. As is obvious, I decided to prime the parts simply because I've been priming everything. The color matches "Lycoming Gray" pretty well too.
The CB-000333 Air Filter Frame Cover is cut, drilled and nutplates are attached.
Moving on to February 2017, I masked off the areas needing RTV. The primer was then removed and the metal scuffed to give the RTV something to bite on to. This is the left aft baffle.
This is the left aft baffle. Note, I neglected to add the strip of RTV on the right side, which I later added. I realized later that the RTV is intended to prevent chaffing, so it's better to let the RTV cure after application prior to attaching the baffling to the engine.
Here are the forward baffles with the RTV.
Generally, the baffles fit well. The left aft baffle took a few hours for me to finagle. I had to bend a tab to get it to fit (it's the tab just under the left nutplate). The left forward baffle took a lot of on-and-off fitting. I had to file down the tab shown below by quite a bit.
On page 47-07, the little standoff highlighted in red is left up to us to fabricate. Mine measured 1.031" for a perfect fit. Go here to see how I made sure that the cut surfaces were perpendicular to the axis of the spacer.
Here are the baffles in place.
Next major step to complete is the snorkel.


No comments:
Post a Comment