When I originally prepared the F-01412A and B aft bulkheads, I made two mistakes. The fist error was dimpling all the holes in the bulkhead webs in the wrong direction. To "fix" this, I decided to just dimple them back the other direction. Many posts abound on VAF regarding this type of error, here being one of them. Folklore says it's okay to just dimple back the other direction Who knows if that's true? I certainly don't. In either case, the material remains a bit warped after squeezing them the other direciton.
Now, the second error was my dimpling two holes that should not have been (circled in red below). In fairness, the plans were specific that they should be dimpled (red box and no exclusion on the figure). Yet, they should not be. The reason being that the tiedown bracket would conflict with any rivets in those holes. So, those holes should remain untouched in the tri-gear version.
To "fix" this, I just flattened those two holes with my squeezer. But, as you can see in the two images below from my 12-Jan-14 post, the bulkhead web was now fairly warped. In fact, the shop ends of the rivets seemed quite short probably due to the holes being rather large.
It turns out that the vertical stab rear spar needs to sit flush against the web of the aft bulkhead (below). Those flattened dimples would make that challenging since they now stick up out-of-plane of the web. I didn't replace the bulkheads back in January of 2014 because my tech counselor and others thought I've been too liberal in replacing things I didn't like. Figuring I was being too picky, I opted to keep these bulkheads.
But, since installing the bulkhead into the aft fuselage, it's been bothering me a lot. Every time I would walk by the aft fuselage (after all, in my old house, it had been on my couch, overhanging into my kitchen), I would look at the bulkheads and try to visualize how to remove and replace them. There is precedent for this on other RV models as some folks change their tri-gears to tail gears (stories exist on VAF about the conversion, but I haven't found any documentation of such with pictures). In December of 2014, I devised a plan: Drill out all the rivets holding the aft bulkheads in, drill out a few longeron and stiffener rivets holding the side skins in so I can pull those skins back a bit, and replace the aft bulkheads with the new ones, as illustrated below. Following replacement, I didn't expect accessing the rivets to buck them to be too challenging.
In February of 2015, I asked one of my blog readers, with whom I frequently correspond and who hadn't yet reached Section 10, if he'd be willing to cleco a full layup of the aft fuselage to see if my plan would work. Indeed, in early May of 2015 he was able to remove the aft bulkhead with it cleco'd in. Below is what he sent me as evidence. What a kind thing to do for me. Thanks Ken! So this was the proof I needed to execute my plan. And I didn't need to remove any of the stiffener rivets.
I counted some 70 rivets that needed to be removed. Yikes. Lots of chances for mistakes. But, I was able to pull out the aft bulkhead without issue. The only expense was a bloody finger, but that's a common malady when building an RV.
The new bulkhead (left) and the old (right). You can see the difference in the surface profiles: Flat vs. warped.
It took a lot of effort to get the new bulkhead in. Primarily because I had to be careful to ensure that the flanges nested on the inside of the longerons, rather than sliding between the longerons and the skin, like they desperately wanted to do.
Here is the bulkhead installed with every rivet that could be squeezed. I left off the F-14113-L/R rudder stops for now because it will make it easier to buck the remaining rivets.
And unlike the original rear bulkhead (left), there are no overlapping flange tabs (right). Either my original F-01412B bulkhead was miscut or they fixed whatever the issue was by the time I ordered the replacement part.
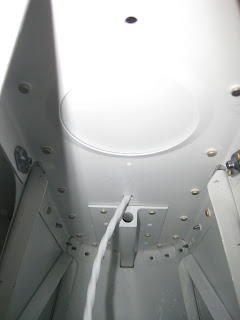
For completeness, here's an inside shot. Just a few more rivets to buck and it's done.


No comments:
Post a Comment