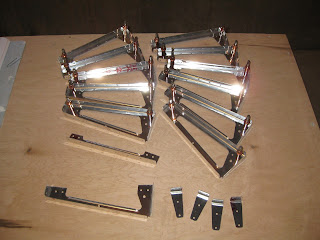
The right elevator has been temporary assembled and all trimming and match drilling is complete. The left elevator is nearly at the same point. The steps here aren't dramatic and are fairly routine. So this is just a chronicle of the busywork necessary to trudge through the process.
First, a lot of ribs need to be cut then cleco'd.
Then the tip rib assemblies are put together for match drilling. These attach quite tightly, so match drilling is important.
The elevator trim tab close-out tabs need to be cut. These are the tabs that will serve much like a lateral rib to fair the
air at the gap between the elevator and the trim tab. After marking the cut lines (left), the cuts came out nicely (right).
Next, the left elevator's skins need their close-out tabs bent properly. After aligning them on the "bend jig" (left), the bend is completed with a wood block, then a few light taps with the mushroom set on the rivet gun and finally followed by the hand seamer.
Next, the left elevator's skins need their close-out tabs bent properly. After aligning them on the "bend jig" (left), the bend is completed with a wood block, then a few light taps with the mushroom set on the rivet gun and finally followed by the hand seamer.
Here is an edge-on view of one of the tabs following bending. Not perfect, but not bad at all.
The bottom skin goes on with the tip rib assembly (left), then the top skin goes on (right) with the newly trimmed trailing edge and horn. These pictures are the right elevator.
For the left elevator, since it includes the trim tab, the piano hinge gets cut and match-drilled. First to the elevator rear spar (left) and then to the trim tab spar (right). I cleco'd and clamped the heck out of it to make sure it was good and straight as I went along. *Note, for the trim tab, I put the piano hinge on the wrong spar flange so I need to scrap that half of the hinge and redo. Thus, the right picture is in error and should not be duplicated. Do not use the flange with two holes. Use the other one.
Here is the temporarily held together right elevator.
The bottom skin goes on with the tip rib assembly (left), then the top skin goes on (right) with the newly trimmed trailing edge and horn. These pictures are the right elevator.
Here is the temporarily held together right elevator.


No comments:
Post a Comment